How to Clean Copper — Complete UK Guide to Restoring Copper Homeware (2026)
Reo on 16 January, 2026 | No Comments
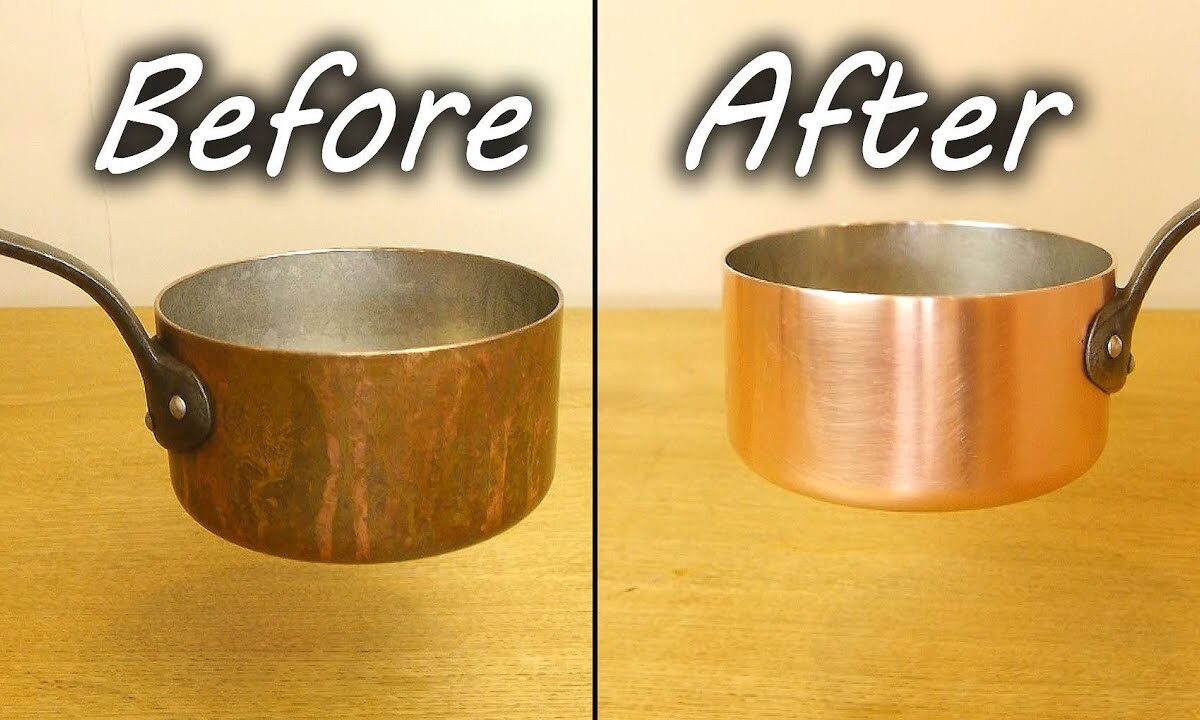
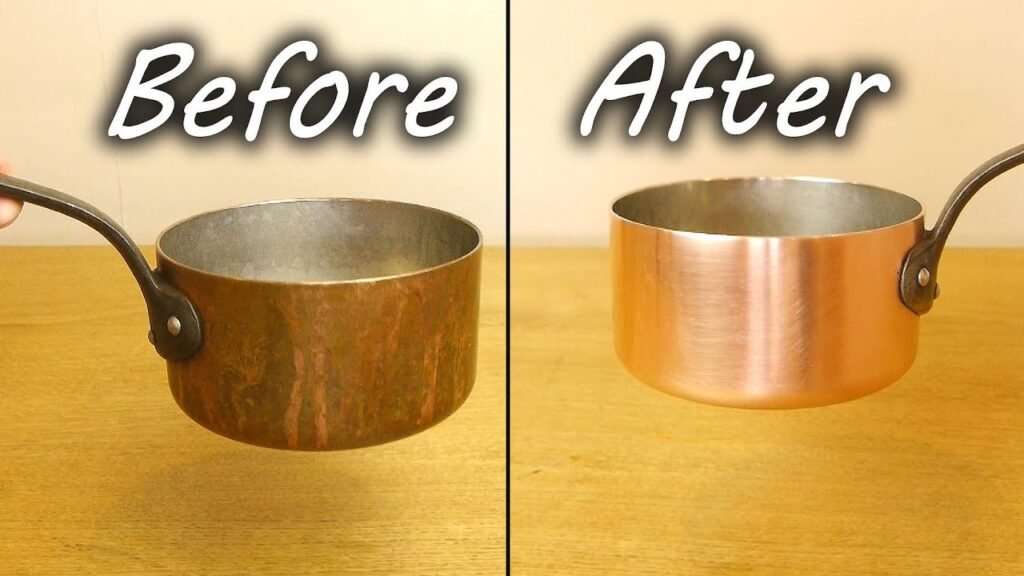
Learning how to clean copper properly transforms tarnished metal back into its original warm, rose-gold brilliance in minutes — using nothing more than ingredients already in your kitchen. There is something deeply satisfying about watching that change happen right in front of you.
Whether you have inherited a set of copper pans, invested in artisan copper homeware, or simply want to restore the shine on a beloved copper mug, this guide covers everything. You will find the five best methods for cleaning copper at home, how to tackle badly tarnished pieces neglected for years, how to restore a copper finish, and how to keep copper looking beautiful long term — all explained clearly and step by step.
No harsh chemicals required. No expensive specialist products. Just proven, natural methods that genuinely work.
Why Does Copper Tarnish in the First Place?
Before diving into how to clean copper, it helps to understand what is actually happening to the surface — because understanding the cause makes every cleaning method more effective.
Copper tarnishes through a process called oxidation. When copper meets oxygen in the air, it reacts to form copper oxide — a darker, duller layer on the surface. This is not damage. It is a completely natural chemical process, and the resulting patina actually forms a protective layer over the copper beneath.
Several factors speed up tarnishing. Humidity is one of the biggest — copper kept in kitchens or bathrooms tarnishes faster than copper stored in dry environments. Salt air in coastal areas has the same effect. Additionally, oils from handling, even from clean hands, leave residues that react with the copper surface over time. Heat from cooking also darkens copper quickly.
The good news is that all of this tarnish — whether light surface dulling or the deep, dark oxidation of long-neglected copper — responds well to the right approach. Here is exactly what works.
Method 1 — Lemon and Salt: The Best Everyday Way to Clean Copper
Best for: Light to moderate tarnish, regular maintenance, copper mugs, cups, decorative pieces Time needed: 5 to 10 minutes
This is the single most effective natural method for cleaning copper and the one we recommend for regular maintenance of Viviana London pieces. The citric acid in lemon breaks down copper oxide chemically, while the salt acts as a gentle physical scrub, lifting residue without scratching the surface.
What you need: One fresh lemon, table salt or fine sea salt, a soft cloth, warm water, a dry towel.
How to clean copper with lemon and salt:
Cut the lemon in half and sprinkle the cut surface generously with salt. Rub the salted lemon directly onto the copper using firm circular motions. You will see the tarnish lifting almost immediately — the lemon juice darkens as it takes in the oxidation, which means it is working. Work across the entire surface, adding more salt for stubborn areas. For tight spots or engraved details, squeeze lemon juice into a small bowl, add salt, and apply with a soft cloth or old toothbrush.
Once the surface is treated, rinse thoroughly under warm running water. Make sure all salt and lemon residue is fully removed. Dry immediately with a soft towel — do not let the copper air dry, as water spots form quickly on freshly cleaned copper.
Pro tip: For stubborn patches, press the salted lemon onto the area and leave it for one to two minutes before rubbing. The extra contact time lets the acid work deeper into the tarnish layer.
Method 2 — Vinegar and Salt Paste: How to Clean Badly Tarnished Copper
Best for: Heavily tarnished copper, badly neglected pieces, copper not cleaned in years Time needed: 20 to 40 minutes
If your copper is seriously tarnished — deeply darkened, almost black in places, or showing years of build-up — lemon alone may not be enough. Vinegar and salt paste is the most powerful natural method for cleaning badly tarnished copper and consistently delivers striking results.
What you need: White vinegar, table salt, plain flour (optional), a soft cloth or soft-bristled brush, warm water, a microfibre cloth.
How to clean heavily tarnished copper with vinegar and salt:
Mix two tablespoons of white vinegar with one tablespoon of salt in a small bowl. If you are cleaning a vertical surface or a shaped piece, add one tablespoon of flour to create a thicker paste that clings rather than running off. Apply the paste generously to the copper surface using a soft cloth. For engraved patterns or hammered textures, work the paste into the detail with a soft brush.
Leave the paste on for 15 to 30 minutes. You may notice slight fizzing — this is the acetic acid in the vinegar reacting with the copper oxide, and it means the method is working exactly as it should. After waiting, rub firmly with circular motions. The tarnish should lift away readily. Rinse thoroughly under warm water — any vinegar residue left on the surface will continue to react and can cause new spots. Dry and buff immediately with a clean, soft cloth.
Pro tip: For copper neglected for many years, repeat the process twice. The first application removes most of the tarnish. The second restores the copper to a true shine.
Method 3 — Baking Soda and Lemon: The Gentle Copper Cleaning Method
Best for: Copper jewellery, frequently used copper mugs, gentle maintenance, lacquered copper Time needed: 5 to 15 minutes
For copper pieces that need regular cleaning — items you use daily or display prominently — a gentler approach prevents gradual surface wear while still keeping the copper bright. Baking soda and lemon juice create a mild paste that cleans well without the stronger acidity of pure lemon or vinegar.
What you need: Baking soda, fresh or bottled lemon juice, a soft cloth or sponge, warm water, a soft towel.
How to clean copper with baking soda and lemon:
Mix three parts baking soda with one part lemon juice in a small bowl. The mixture will fizz at first as the acid and alkali react — this is normal and settles quickly. Apply the paste to your copper using a soft cloth, working it over the entire surface in circular motions. For light everyday tarnish, rub straight away. For moderate tarnish, allow the paste to sit for five to ten minutes first.
Rinse thoroughly with warm water, checking that no white baking soda residue remains in corners or engraved details. Dry thoroughly with a soft towel, then gently buff to bring out the copper’s natural glow.
Pro tip: This is the right method for Viviana London copper mugs and other daily drinkware. The gentler acidity protects the surface over repeated cleaning cycles — a stronger vinegar paste would gradually wear it down over time.
Method 4 — Tomato Ketchup: The Surprisingly Effective Copper Cleaning Method
Best for: Decorative copper pieces, complex shapes, gentle tarnish removal, cleaning with children. Time needed: 15 to 30 minutes
This may sound unusual, but ketchup is one of the most effective and gentle methods for cleaning copper available. The combination of tomato acid and vinegar in ketchup works steadily on tarnish while being mild enough for delicate pieces and completely safe around children.
What you need: Standard tomato ketchup (Heinz works consistently well), a soft cloth, warm water, a dry towel.
How to clean copper with ketchup:
Spread a generous layer of ketchup evenly across the tarnished copper surface. Do not be sparing — full coverage gives the best results. Leave the ketchup to sit for 15 to 30 minutes, depending on the level of tarnish. Light tarnish needs less time. More heavily darkened copper benefits from the full half-hour.
Using a soft cloth, rub the ketchup into the surface with circular motions. Unlike lemon or vinegar, the change is not immediate during application — instead, it becomes clear during the rubbing stage as the tarnish lifts away to reveal bright copper beneath. Rinse thoroughly under warm running water to remove all tomato residue. Dry and buff immediately.
Pro tip: This method is ideal for copper with hammered textures or engraved details. The thick consistency of ketchup reaches into surface details without running off. Furthermore, it works brilliantly on copper hardware — handles, knobs, and fixtures — where you want a clean, controlled application.
Method 5 — Commercial Copper Polish: When You Need Guaranteed Results
Best for: Valuable antiques, heirloom pieces, copper before special occasions, maximum shine. Time needed: 10 to 20 minutes
When natural methods need a helping hand — or when you are restoring a finish on a valuable or sentimental copper piece — a purpose-made copper polish delivers the most reliable results.
What you need: Quality copper polish such as Brasso, Cape Cod, or Wright’s Copper Cream, two soft cloths, optional gloves, warm water, a dry towel.
How to use commercial copper polish:
Read the manufacturer’s instructions for your specific product before starting, as methods vary between brands. Apply a small amount of polish to a soft cloth — a little goes a long way with quality products. Work the polish onto the copper surface using gentle circular motions.
Most polishes create a slight haze as they dry — this shows the chemical reaction breaking down tarnish and is completely normal. Continue rubbing until the tarnish lifts and the surface begins to shine. Apply fresh polish to a fresh section of cloth for heavily tarnished areas. Wipe away all residue with a clean, dry cloth, then buff firmly to activate the shine and the protective layer.
Pro tip: Use commercial polish sparingly, and only when natural methods are not achieving the result you need. For everyday copper homeware maintenance, natural methods are better — they are gentler, cheaper, and just as effective for regular tarnish.
How to Clean Heavily Tarnished Copper — Step by Step
If your copper has been neglected for years and has turned very dark, almost black, or has developed green patches (verdigris), follow this specific process to restore it fully.
Step 1 — Assess the piece. Check whether the green patches are on the exterior only (verdigris from oxidation — harmless and removable) or on the interior of a lined copper pot or mug. Interior patching means the lining has worn through, and the pot needs relining before use with food or drink.
Step 2 — First clean with vinegar and salt paste. Apply a generous paste of white vinegar, salt, and flour. Leave for 30 minutes, rub firmly, rinse thoroughly, and dry. This removes the bulk of the deep tarnish.
Step 3 — Second clean with lemon and salt. Follow straight away with the lemon-and-salt method. This lifts remaining tarnish and begins restoring the copper’s natural shine.
Step 4 — Finish with baking soda paste. Apply the baking soda and lemon paste and buff to a shine. This clears any leftover acid from previous steps and leaves a clean, bright surface.
Step 5 — Dry and protect. Dry completely, then optionally apply a thin coat of clear metal lacquer or a small amount of mineral oil to the exterior to slow future tarnishing.
For the most severely neglected pieces, a commercial copper polish after Step 2 can speed up the restoration significantly.
How to Restore a Copper Finish
Restoring a copper finish goes one step further than cleaning copper — it means returning the metal to a deliberate, uniform appearance rather than simply removing tarnish. Here is how to achieve different finishes.
Bright polished finish: Follow the full five-step process above, finishing with a quality commercial polish and firm buffing. Apply a thin coat of clear lacquer to preserve the result.
Natural warm glow (unpolished): Clean with a lemon and salt solution, rinse and dry, then leave the copper without lacquer or wax. Copper will naturally develop a soft, warm patina over time — this is the living finish that many people consider copper’s most beautiful state.
Deliberate aged patina: If you want to keep an intentionally darkened finish — common on decorative artisan copper — clean gently with baking soda and lemon only. This removes surface dirt without stripping the deep patina beneath. Do not use vinegar or commercial polish, as these will remove the aged finish entirely.
Copper hardware refinishing: For copper door handles, cabinet hardware, or fixtures, remove the piece if possible. Clean thoroughly with vinegar and salt paste, rinse and dry completely, then apply a copper hardware sealant or lacquer for long-term protection.
How to Clean Different Types of Copper
Copper Cookware and Pots
Always clean copper cookware exteriors with the methods above. For interiors with tin or stainless steel linings, use warm water and mild washing-up liquid only — never use abrasive methods on the interior lining. Never put copper cookware in a dishwasher. The harsh detergents and heat cycles cause damage to both the copper exterior and any interior lining.
Copper Mugs and Drinkware
The baking soda and lemon method is ideal for routine copper mug cleaning. Any of the five methods work well on the exterior. Check the interior lining regularly — a bright silver interior is intact and safe. A dull, patchy, or copper-coloured interior means the lining needs attention before you use the mug for acidic drinks.
Copper Jewellery
Use the baking soda and lemon method only — it is the gentlest option and safe for delicate pieces and most gemstone settings. For pieces with stones or very fine details, warm soapy water and a soft toothbrush is the safest approach. Dry completely before storing.
Decorative Copper and Vases
Consider whether you actually want to remove the patina before cleaning copper decorative pieces. Many look more beautiful with an aged, darkened finish. If the piece has an intentionally aged finish from the maker, use baking soda and lemon to remove surface grime only — do not strip the patina.
Antique Copper
Valuable antiques need particular care. Some patinas significantly increase the value of antique copper — removing them can reduce it considerably. When uncertain, consult an antique specialist before cleaning copper antiques. If cleaning yourself, always test any method on the most hidden area available before going further. You can find specialist guidance at the British Antique Dealers’ Association.
How to Prevent Copper Tarnishing — Long-Term Care Tips
Keeping copper clean is far easier than restoring it. These habits make a real difference.
Dry immediately after every use. Water is the main driver of copper tarnishing. Thoroughly drying copper after washing — including after it gets wet during normal use — slows tarnishing significantly.
Handle with clean, dry hands. Oils and moisture from skin speed up oxidation. For valuable or decorative pieces, consider soft cotton gloves.
Store in dry conditions. Humidity is copper’s enemy. Store copper pieces away from kitchen steam, bathroom moisture, or outdoor air in coastal areas.
Clean little and often. A quick lemon-and-salt clean every few weeks is far less effort than a full vinegar-and-salt restoration every few months. Regular light copper cleaning stops tarnish from building up to the point where it needs heavy treatment.
Consider lacquering decorative pieces. For copper you display rather than use, a coat of clear metal lacquer provides long-term protection and cuts down on cleaning considerably. Many UK metal specialists offer professional lacquering services. Alternatively, clear lacquer spray is available from most hardware stores for home use.
Avoid dishwashers entirely. For any copper piece — cookware, drinkware, or decorative — dishwashing causes damage that cannot be reversed. Hand washing is always the right choice.
How to Clean Copper — Frequently Asked Questions
What is the best way to clean copper at home? For most copper pieces with light to moderate tarnish, the lemon-and-salt method is the best everyday approach — fast, effective, completely natural, and using ingredients you already own. For seriously tarnished copper, the vinegar-and-salt paste method delivers the most dramatic results.
Is it safe to clean copper with vinegar? Yes, for most copper pieces. However, rinse thoroughly afterwards, as vinegar left on the surface will continue to react. Additionally, do not use vinegar on intentionally aged or antique copper pieces where you want to preserve the patina.
How often should I clean copper? For copper you use daily — mugs, drinkware, cookware — a light clean every two to three weeks keeps tarnish from building up. For decorative copper, clean as needed when tarnish becomes visible.
The Bottom Line on How to Clean Copper
Cleaning copper is one of the most satisfying household tasks — the shift from dark, tarnished metal to warm, glowing brilliance happens quickly and visibly, using nothing more than kitchen ingredients you already own.
The key principles are simple. Use the right method for the level of tarnish. Rinse thoroughly after each copper cleaning session. Dry immediately. Clean little and often to prevent heavy build-up.
For light maintenance — lemon and salt. For badly tarnished copper — vinegar and salt paste. For regular, gentle cleaning of drinkware and jewellery — baking soda and lemon. For valuable or antique pieces — commercial polish, used carefully.
With proper care, a quality copper piece lasts 30, 40, or even 50 years and looks more beautiful with every passing year. That is what makes copper one of the most rewarding materials to own and look after.
Shop Viviana London’s handcrafted 99.9% pure copper homeware collection — designed to last a lifetime, with free UK delivery on orders over £100.