
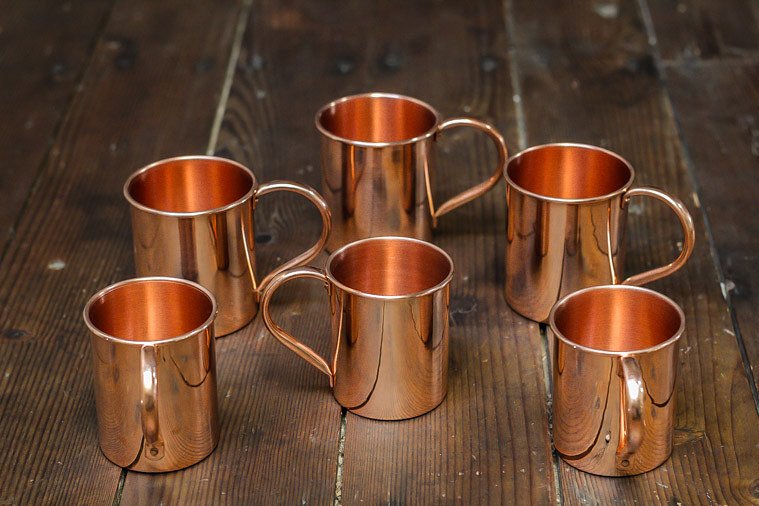
If you’ve recently invested in beautiful copper mugs for your Moscow Mules or wellness water routine, you’re probably wondering about the best way to keep them looking pristine. The question “Are copper mugs dishwasher safe?” is one of the most common concerns among new copper drinkware owners—and for good reason. The answer might surprise you and could save your investment from permanent damage.
In this comprehensive guide, we’ll answer the dishwasher question definitively, explain the science behind copper care, and provide you with professional cleaning techniques that will keep your copper mugs looking stunning for years to come.
The Short Answer: No, Copper Mugs Are NOT Dishwasher Safe
Let’s get straight to the point: copper mugs should never go in the dishwasher, even if the manufacturer claims they’re dishwasher safe. While some copper-plated stainless steel mugs might survive the dishwasher, pure copper mugs will suffer damage that compromises both their appearance and functionality.
This applies to all types of copper drinkware, including Moscow Mule mugs, copper tumblers, copper wine glasses, and copper water vessels. Whether your copper mug is lined with nickel or tin, or completely unlacquered pure copper, the dishwasher is your copper’s worst enemy.
Now, let’s explore exactly why this is the case and what you should do instead.
What Happens When You Put Copper Mugs in the Dishwasher?
Understanding the science behind why dishwashers damage copper will help you appreciate the importance of proper hand washing.
High Heat Damage
Dishwashers use extremely hot water—typically between 50-70°C (120-160°F)—during the wash and rinse cycles. The drying cycle can be even hotter. This intense heat causes several problems for copper:
Accelerated Oxidation: Heat speeds up the natural oxidation process of copper. What would normally take months to develop can happen in just a few dishwasher cycles. Your beautiful, shiny copper mug will quickly develop a dark, uneven patina that’s difficult to restore.
Warping and Shape Distortion: Pure copper is a soft, malleable metal. Repeated exposure to high heat can cause thin copper walls to warp slightly, especially around handles and rims. This distortion may be subtle at first but worsens with each wash cycle.
Weakened Joints: If your copper mug has a handle attached with solder or rivets, the intense heat can weaken these connections over time, potentially causing handles to become loose or detach entirely.
Harsh Detergent Chemical Reactions
Modern dishwasher detergents are formulated to be highly alkaline and contain aggressive cleaning agents like phosphates, chlorine, and surfactants. These chemicals are excellent at removing food residue from plates but are far too harsh for copper.
Surface Etching: Alkaline detergents can etch the copper surface, creating microscopic pits and scratches that dull the finish permanently. This damage cannot be reversed with polishing.
Discoloration and Spotting: The combination of hot water, steam, and chemical detergents creates the perfect conditions for rapid tarnishing. Your copper mug will develop dark spots, streaks, and an overall dull appearance.
Removal of Protective Coatings: If your copper mug has a protective lacquer coating (common on decorative copper pieces), dishwasher detergents will strip this coating away, leaving the copper vulnerable to tarnishing and requiring more frequent maintenance.
Water Mineral Deposits
The hard water used in most dishwashers contains minerals like calcium and magnesium. When this water evaporates during the drying cycle, it leaves behind white, chalky deposits on the copper surface.
These mineral deposits are notoriously difficult to remove from copper and create unsightly spots that mar the appearance of your mugs. Over time, these deposits can build up and become nearly impossible to clean without aggressive methods that may damage the copper.
Abrasion from Other Items
During the wash cycle, items shift and knock against each other. Copper is a relatively soft metal, and contact with harder materials like stainless steel, ceramic, or glass can scratch and dent the surface.
Even a single dishwasher cycle can result in permanent scratches that diminish the beauty of your copper mug. Multiply this by dozens or hundreds of washes, and you’ll end up with battered, scarred drinkware that’s lost its original lustre.
The Proper Way to Clean Copper Mugs: Step-by-Step Hand Washing Guide
Now that you understand why dishwashers are off-limits, let’s discuss the right way to clean your copper mugs. Proper hand washing is simple, quick, and will preserve your copper’s beauty indefinitely.
Daily Cleaning for Regular Use
After each use, follow this simple routine:
Step 1: Rinse Immediately
As soon as you finish your drink, rinse your copper mug with warm water. This prevents residue from drying and bonding to the copper surface, making cleaning much easier.
Step 2: Wash with Mild Dish Soap
Add a few drops of gentle, pH-neutral dish soap to warm water. Using a soft sponge or cloth, gently wash the inside and outside of the mug. Avoid abrasive scrubbers, steel wool, or rough sponges that can scratch the copper.
Step 3: Clean the Handle and Crevices
Pay special attention to the handle attachment points and any hammered textures where residue can accumulate. Use a soft-bristled brush if needed to reach tight spots.
Step 4: Rinse Thoroughly
Rinse the mug completely under warm running water, ensuring all soap residue is removed. Soap left on copper can create streaks and dull the finish.
Step 5: Dry Immediately
This is crucial: dry your copper mug immediately with a soft, clean towel. Never air-dry copper, as water spots and tarnish will develop. Buff the surface gently as you dry to maintain its shine.
The entire process takes less than two minutes and will keep your copper mugs looking pristine with minimal effort.
Deep Cleaning Methods: Natural Solutions for Copper
Even with regular washing, copper naturally tarnishes over time due to oxidation. This is completely normal and doesn’t indicate poor quality. Deep cleaning once every week or two will restore your copper’s brilliant shine.
Method 1: Lemon and Salt (Most Popular)
This is the gold standard for cleaning copper—it’s natural, effective, and uses ingredients you already have in your kitchen.
What You’ll Need:
- 1 lemon, cut in half
- 2-3 tablespoons of table salt
- Soft cloth or sponge
Instructions:
- Sprinkle salt generously over the tarnished areas of your copper mug
- Dip the cut lemon half into additional salt
- Rub the salted lemon directly onto the copper surface in circular motions
- The acid in the lemon reacts with the tarnish while the salt acts as a gentle abrasive
- Continue rubbing until you see the tarnish lifting and the copper brightening
- Rinse thoroughly with warm water
- Dry immediately with a soft cloth, buffing to a shine
Why It Works: The citric acid in lemon dissolves copper oxide (tarnish) while the salt provides gentle mechanical scrubbing without scratching the surface.
Method 2: Vinegar and Salt Paste
For heavier tarnish or stubborn spots, this method provides extra cleaning power.
What You’ll Need:
- 3 tablespoons white vinegar
- 1 tablespoon salt
- Soft cloth or sponge
- Soft-bristled brush (optional)
Instructions:
- Mix the vinegar and salt in a small bowl to create a paste
- Apply the paste to tarnished areas using a soft cloth
- Gently rub in circular motions, letting the paste sit for 30 seconds on heavy tarnish
- For textured or hammered copper, use a soft brush to work the paste into crevices
- Rinse thoroughly with warm water
- Dry immediately and buff to restore shine
Pro Tip: For very tarnished mugs, you can heat the vinegar slightly (not boiling) before mixing with salt for enhanced cleaning power.
Method 3: Baking Soda and Lemon Juice
This gentle method works well for regular maintenance and light tarnish.
What You’ll Need:
- 2 tablespoons baking soda
- Fresh lemon juice (from 1/2 lemon)
- Soft cloth
Instructions:
- Make a paste by mixing baking soda with enough lemon juice to form a spreadable consistency
- Apply the paste to the copper surface
- Gently rub in circular motions
- Let it sit for 2-3 minutes (no longer, as baking soda is slightly abrasive)
- Rinse thoroughly with warm water
- Dry and buff immediately
When to Use: This method is ideal for copper mugs with delicate engraving or thin walls, as it’s less aggressive than salt-based methods.
Method 4: Ketchup Method (Surprisingly Effective!)
Yes, you read that correctly. Ketchup contains acetic acid from vinegar and is mildly abrasive, making it an unexpected but effective copper cleaner.
Instructions:
- Squeeze a thin layer of ketchup onto the tarnished copper
- Spread it evenly with a soft cloth
- Let it sit for 5-10 minutes
- Rub gently in circular motions
- Rinse thoroughly and dry immediately
Best For: This method works particularly well on copper mugs with intricate hammered patterns where paste cleaners might get stuck in crevices.
How to Remove Stubborn Tarnish and Heavy Oxidation
If your copper mugs have been neglected or stored improperly, they may have developed heavy, dark tarnish that resists standard cleaning methods. Here’s how to tackle severe tarnish:
The Vinegar Soak Method
For extremely tarnished copper, a brief soak can work wonders.
Instructions:
- Fill a basin or sink with equal parts white vinegar and warm water
- Add 2 tablespoons of salt and stir to dissolve
- Submerge the copper mug for 15-30 minutes (no longer to avoid over-exposure)
- Remove and gently scrub with a soft sponge
- Rinse thoroughly with clean water
- Dry and polish immediately
Warning: Never soak copper mugs overnight or for extended periods, as prolonged acid exposure can damage the copper.
Commercial Copper Cleaners
If natural methods aren’t achieving the results you want, commercial copper cleaners like Bar Keeper’s Friend or Wright’s Copper Cream are formulated specifically for copper care.
How to Use:
- Follow the product instructions carefully
- Apply with a soft cloth using gentle circular motions
- Work in small sections
- Rinse extremely thoroughly—commercial cleaners must be completely removed
- Dry and buff immediately
Note: Use commercial cleaners sparingly, as they’re more aggressive than natural methods. Reserve them for stubborn tarnish that won’t respond to lemon and salt.
Professional Polishing Techniques for Restaurant-Quality Shine
Want your copper mugs to look like they just came out of a luxury bar? Here are professional polishing secrets:
The Two-Cloth Method
After cleaning, use this technique for maximum shine:
- First Cloth (Damp): Use a slightly damp, soft microfiber cloth to remove any remaining residue and create an even surface
- Second Cloth (Dry): Use a completely dry microfiber cloth to buff the copper in long, sweeping motions rather than circular ones
- Apply moderate pressure and work systematically around the entire mug
- The copper should develop a mirror-like shine
Specialty Polishing Cloths
Invest in copper-specific polishing cloths that are pre-treated with gentle polishing compounds. Brands like Sunshine Polishing Cloth are excellent for maintaining copper between deep cleans.
Simply rub the treated cloth over clean, dry copper to restore lustre in seconds. These cloths can be used repeatedly until the polishing compound is depleted.
Common Copper Cleaning Mistakes to Avoid
Even with good intentions, many people inadvertently damage their copper mugs through improper cleaning. Avoid these common mistakes:
Using Abrasive Scrubbers
Steel wool, abrasive sponges, and scouring pads will scratch copper permanently. Always use soft cloths, sponges, or brushes with natural bristles.
Letting Copper Air Dry
Water contains minerals that leave spots and accelerate tarnishing. Always hand-dry copper mugs immediately after washing or rinsing.
Cleaning Too Aggressively
Copper is soft—you don’t need to scrub hard. Gentle, consistent pressure with the right cleaning solution is far more effective than aggressive scrubbing.
Using Chlorine Bleach
Never use bleach or bleach-containing cleaners on copper. Chlorine reacts with copper to create permanent green discoloration that cannot be reversed.
Storing Wet Copper
Putting away damp copper mugs creates the perfect environment for rapid tarnishing and potentially mold growth if moisture is trapped.
Leaving Acidic Liquids Overnight
Never store acidic beverages (citrus juices, wine, cocktails) in copper mugs for extended periods. The acid reacts with copper, causing excessive leaching and potential health concerns.
Storage Tips to Reduce Tarnishing
Proper storage significantly reduces how often you’ll need to deep clean your copper mugs.
Store in Dry Locations
Keep copper mugs in a cabinet or shelf away from humidity. Avoid storing them near dishwashers, sinks, or in damp basements.
Use Felt or Paper Separators
If stacking copper mugs, place felt pads or paper towels between them to prevent scratching and allow air circulation.
Consider Anti-Tarnish Strips
Anti-tarnish strips (available at jewellery supply stores) absorb moisture and airborne chemicals that cause tarnishing. Place one in your copper storage area.
Display vs Storage
If displaying copper mugs openly, expect more frequent cleaning. Dust and air exposure accelerate tarnishing. For less maintenance, store them in closed cabinets when not in use.
Avoid Plastic Bags
Never store copper in sealed plastic bags or containers. Lack of air circulation traps moisture and accelerates tarnishing. If you must cover them, use breathable fabric bags.
When to Replace Your Copper Mugs
With proper care, quality copper mugs can last for decades or even generations. However, there are situations where replacement becomes necessary:
Signs Your Copper Mug Needs Replacing
Structural Damage: Cracks, holes, or splits in the copper cannot be safely repaired and pose contamination risks.
Detached Handles: If the handle has separated from the mug body or is wobbly despite attempts to repair, the mug is no longer safe to use.
Severe Pitting: Deep pits or corrosion that cannot be cleaned indicate advanced degradation. These areas can harbour bacteria and affect beverage taste.
Lining Damage: For tin-lined or nickel-lined mugs, if the lining is wearing away and exposing bare copper in patches, the mug should be replaced or re-lined professionally.
Persistent Metallic Taste: If your beverages consistently taste metallic even after thorough cleaning, the copper may be degraded beyond safe use.
Restoration vs Replacement
For heirloom or high-quality artisan copper mugs, professional restoration is worth considering. Skilled coppersmiths can re-tin linings, repair handles, and restore severely tarnished copper to like-new condition.
However, for mass-produced or lower-cost copper mugs, replacement is typically more economical than professional restoration.
Final Thoughts: Keep Your Copper Mugs Stunning for Years
The key to maintaining beautiful copper mugs is simple: hand wash with care, dry immediately, and perform regular deep cleaning with natural solutions. While it might seem easier to toss them in the dishwasher, the damage from even a few wash cycles can permanently diminish your investment.
Think of copper care as a small ritual that connects you to centuries of tradition. The few extra minutes you spend hand washing and polishing your copper mugs will be rewarded with stunning drinkware that looks as beautiful in five years as it did on day one.
Your copper mugs deserve better than the dishwasher. Treat them with the respect they deserve, and they’ll serve you brilliantly for years to come—keeping your Moscow Mules icy cold, your water antimicrobial, and your home bar looking absolutely spectacular.
Ready to put these cleaning tips into practice? Your copper mugs are waiting for the care they deserve. And remember: when someone asks if copper mugs are dishwasher safe, you now know the answer—and exactly why it matters.